
The Autumn Deep Clean Guide: 8 Spots Everyone Forgets To Tackle
You can feel it in the air: the crisp mornings, the earlier sunsets and that undeniable urge to nest and create a cosy sanctuary before winter arrives.
But here’s the thing. Most of us stick to the obvious cleaning tasks like hoovering the carpets and wiping down the kitchen counters. Meanwhile, there are hidden spots around your home quietly collecting dust, grime and bacteria. These forgotten areas might not seem like a big deal now, but give them a few more months and they’ll become proper cleaning nightmares.
This guide will walk you through eight commonly overlooked spots that desperately need your attention this autumn. Trust me, tackling these now will make your home fresher, healthier and so much easier to maintain throughout winter!
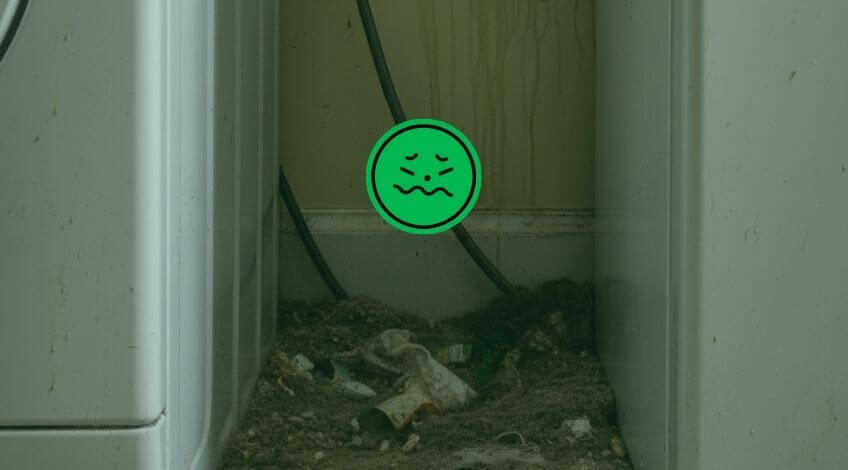
#1: Behind And Under Large Appliances
When was the last time you pulled out your fridge or washing machine? If you’re scratching your head trying to remember, you’re not alone. These spaces are absolute magnets for dust, food crumbs, and all sorts of unpleasant build up that we simply don’t see in our daily lives.
This is especially important if you’re preparing for winter when we spend more time indoors with windows closed. All that trapped dust and debris can affect your indoor air quality and even make allergies worse.
Start by unplugging your appliances for safety. Then, carefully pull them away from the wall. You might need someone to help with the heavier ones! Once you’ve got access, use your hoover’s crevice tool to suck up the dust bunnies and debris. Follow up with a damp cloth to wipe down the floor and the back of the appliance.
Don’t forget to check the coils at the back of your fridge while you’re at it. Dusty coils make your fridge work harder, which means higher energy bills. A quick clean can actually save you money! Just use a coil brush or your hoover’s brush attachment to gently remove the dust.
#2: Inside Light Fixtures And Lampshades
Look up at your light fixtures right now. See that layer of dust and dead insects? Light fixtures are one of those spots we never think about until they’re visibly grimy, but they collect an astonishing amount of dust over time.

This becomes even more noticeable in autumn and winter when we’re using our lights more often. That dust isn’t just unsightly, it actually dims your lighting and makes your rooms feel darker than they need to be.
Turn off the lights and let the bulbs cool completely before you start. Remove any glass covers or shades and wash them in warm, soapy water. For fabric lampshades, use a lint roller or the brush attachment on your hoover to remove dust. You can also use a slightly damp microfibre cloth for stubborn marks, but make sure the fabric is completely dry before switching the light back on.
For ceiling fixtures, you might need a step ladder and a damp cloth to wipe away the dust. This is also a brilliant time to check if any bulbs need replacing. There’s nothing worse than discovering a dead bulb in the middle of a dark winter evening!
#3: Skirting Boards And Architraves
Skirting boards are the unsung heroes of our homes, protecting our walls from scuffs and knocks. They’re also dust and dirt magnets that most of us walk past without a second glance.
The problem is that skirting boards sit right where dust settles after floating down from higher surfaces. Add in splashes from mopping, scuff marks from shoes and general grime and you’ve got yourself some properly dirty woodwork.
Get yourself a bucket of warm water with a splash of washing up liquid. Use a damp cloth or sponge to wipe along the skirting boards, working from one end of the room to the other. For stubborn marks, a magic eraser works wonders! Just dampen it and gently rub at the marks until they disappear.
Don’t forget the tops of door frames and architraves while you’re at it. These collect dust too, and cleaning them now means you won’t have cobwebs forming over winter. Plus, there’s something incredibly satisfying about seeing bright white skirting boards against clean floors!
#4: Window Tracks And Sills
Window sills and tracks are probably the grimiest spots in your entire home and most of us only notice when we’re opening windows on a rare sunny day. The tracks collect everything: dust, dead insects, condensation residue, and outdoor dirt that blows in.
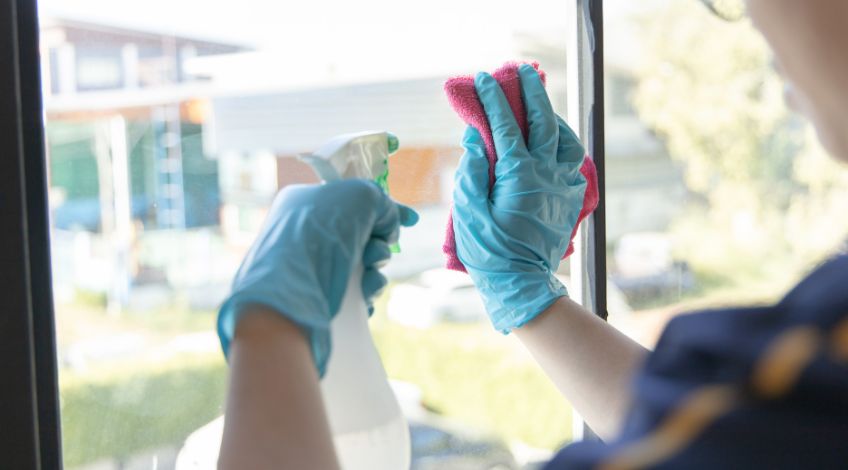
This is particularly important before winter because condensation becomes a much bigger issue when it’s cold outside and warm inside. Clean window tracks mean better drainage and less chance of mould developing in those tight spaces.
Start by using your hoover’s crevice tool to remove loose dirt and debris from the tracks. Then, mix up some warm water with white vinegar (equal parts works perfectly). Dip an old toothbrush into the solution and scrub along the tracks, getting into all those corners and grooves.
For really stubborn grime, sprinkle some bicarbonate of soda into the tracks first, then spray with the vinegar solution. It’ll fizz up and help loosen the dirt. Wipe everything away with a damp cloth, then dry thoroughly with a clean towel.
The window sills themselves often get neglected too. Wipe them down with your vinegar solution, paying special attention to corners where mould might be starting to form. If you spot any black spots, that’s mould and needs to be treated properly before it spreads.
#5: Inside Kitchen Cupboards And Drawers
Your kitchen cupboards might look fine from the outside, but open them up and you’ll likely find crumbs, sticky spills and mysterious stains that have been there for months. Out of sight, out of mind, right?
Before winter sets in and you’re spending more time cooking hearty meals and baking, it’s worth giving these spaces a proper clean. You’ll thank yourself later when you’re not dealing with stale crumbs and sticky shelves while trying to find the Christmas biscuit tin!
Empty one cupboard at a time. This is also a brilliant opportunity to check expiry dates and declutter any items you’re never going to use. Be honest with yourself: are you really going to use that tin of chickpeas from 2022?
Wipe down the shelves with warm, soapy water. For sticky residue, let the soapy water sit for a few minutes to soften it up before wiping. Dry everything thoroughly before putting items back. Consider lining shelves with wipeable shelf liner to make future cleaning even easier.
Don’t forget your drawers! Tip out all the contents (you’ll be amazed what you find hiding in there) and wipe down the insides. Utensil drawers especially can get surprisingly grotty with food particles and mysterious sticky patches.
#6: Underneath Sofa Cushions
Be brave. Lift up those sofa cushions and prepare yourself for what you might find. Loose change? Crumbs? That remote control you’ve been searching for? All of the above?
This spot is particularly important if you have kids or pets, or if you’re guilty of eating snacks on the sofa (no judgement here!). All those crumbs and bits of debris can attract pests and create unpleasant smells over time.
Remove all the cushions and give them a good shake outside if possible. Use your hoover’s upholstery attachment to thoroughly clean the base and sides of the sofa. Get right into the crevices where the seat meets the back and arms, that’s where most of the gunk accumulates.
If your cushion covers are removable and washable, now’s the perfect time to pop them in the machine. Check the care label first, but most can be washed on a gentle cycle. This will freshen up your entire living room and make it feel so much more inviting for those cosy autumn evenings.
For leather sofas, wipe down the surface with a barely damp cloth, then use a proper leather conditioner to keep it supple through the dry winter months. Central heating can really dry out leather, so a bit of TLC now will keep it looking lovely.
#7: Extractor Fan Covers
Your extractor fans work hard to remove steam, cooking smells and moisture from your bathroom and kitchen. But when did you last actually clean them? Those grilles and covers get absolutely caked in dust and grease, which makes them far less effective.
This matters even more heading into winter when we’re showering in steamy bathrooms and cooking warming meals. A clean extractor fan will do its job properly, reducing condensation and preventing mould growth in your home.
For bathroom extractor fans, carefully remove the cover (most just pop off or have a simple clip mechanism). Soak it in warm, soapy water for about 10 minutes, then scrub with an old toothbrush to remove dust and grime. Rinse well and let it dry completely before putting it back.
Kitchen extractor fans need a bit more elbow grease because of the grease build up. Use a degreasing spray or a mixture of washing up liquid and warm water. The grease might need some serious scrubbing, but stick with it! You’ll be amazed at how much gunk comes off.
While the cover is off, use your hoover to carefully remove dust from the fan blades if you can reach them safely. Don’t stick anything into the fan mechanism, just hoover what you can see.
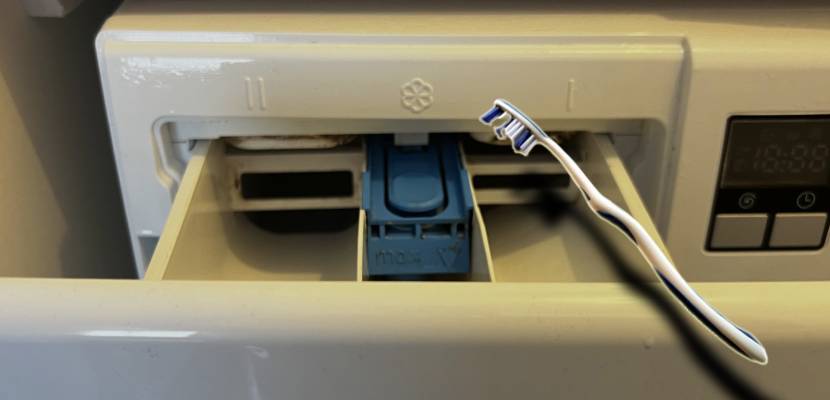
#8: Washing Machine Drawer And Door Seal
Here’s a funny thing: we trust our washing machines to clean our clothes, but we rarely clean the machines themselves properly. The detergent drawer and rubber door seal are breeding grounds for mould, mildew and limescale, especially if you use liquid detergent or eco washes.
Getting these spots clean before winter means your clothes will come out fresher and your machine will work more efficiently. Plus, you’ll avoid that horrible musty smell that can transfer to your clean washing!
Pull out the detergent drawer completely (there’s usually a button or tab you press to release it). Soak it in hot, soapy water and use an old toothbrush to scrub away the gunk in all the compartments. The fabric softener bit is usually the worst! Rinse thoroughly and dry before putting it back.
The rubber door seal needs special attention. Lift up the rubber and you’ll probably find all sorts of nasties hiding in there: hair, small coins, fluff and black mould. Wipe it down with a cloth dampened with a solution of equal parts water and white vinegar. This will kill the mould and prevent it coming back.
For stubborn mould, make a paste with bicarbonate of soda and water, apply it to the affected areas, and let it sit for 15 minutes before scrubbing and rinsing. Leave the washing machine door open after cleaning to let everything dry properly.
Run an empty hot wash with a cup of white vinegar once a month to keep the drum fresh and prevent limescale build up. Your washing machine will last longer and your clothes will smell better!
Your Home Deserves This Autumn Reset
Tackling these eight forgotten spots might seem like a lot of work, but think of it as an investment in your comfort over the coming months. A thoroughly clean home isn’t just about appearances, it’s about creating a healthier, more pleasant environment where you actually want to spend time.
The beauty of doing this deep clean now is that maintenance becomes so much easier. Once you’ve got these areas properly clean, a quick wipe here and there will keep them in good shape throughout winter. You won’t be dealing with months of built up grime when spring rolls around!
Remember, you don’t have to do everything in one day. Pick one or two spots each weekend and work your way through the list. Before you know it, your home will be sparkling clean and ready for whatever autumn and winter throw at it.
If you found these tips helpful, share them with your friends on Facebook! Everyone deserves a cleaner, fresher home this autumn.
SEE ALSO: The Pillow Fluffing Trick Hotels Don’t Want You To Know
Also, follow us on Pinterest ...


