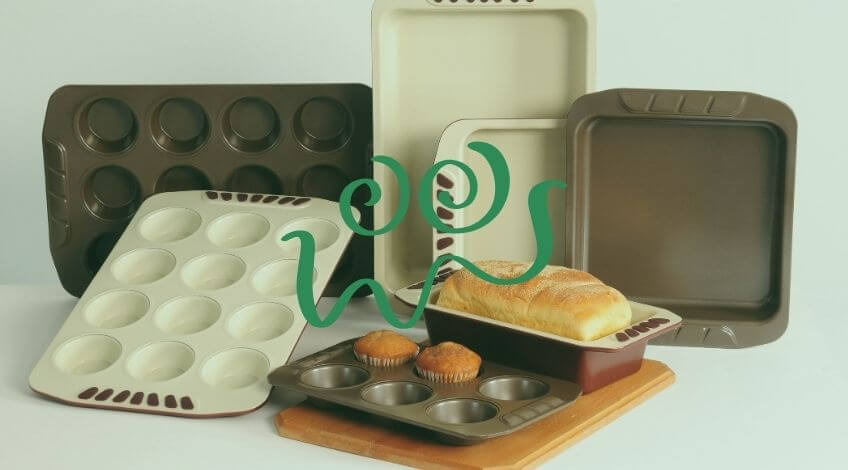
The Easiest Way To Organise Baking Trays (No More Cupboard Avalanche!)
Picture this: you’re rushing to get dinner ready, you open your cupboard to grab a baking tray, and suddenly you’re playing Jenga with a tower of wobbling metal sheets that threaten to crash down on your toes. Sound familiar?
If you’re tired of the daily battle with unstable stacks of trays and pans, you’re not alone. Fortunately, organising your baking trays doesn’t require fancy gadgets or a complete kitchen overhaul. With these simple, practical solutions, you can transform your chaotic cupboard into a streamlined system that actually works for real life.
Why Baking Tray Storage Drives Us Mad
Before we jump into the solutions, let’s talk about why baking tray storage is such a nightmare in the first place. Most of us end up stacking everything together because it seems like the obvious choice. You’ve got limited cupboard space, and stacking feels efficient. But here’s the problem: every time you need the tray at the bottom, you have to lift everything else out first.
This creates a domino effect where one simple task turns into a five minute reorganisation session. Plus, all that shifting and moving means your trays get scratched, and you’re constantly worried about dropping something heavy on your feet. It’s no wonder so many of us avoid baking altogether when we know we’ll have to face the cupboard chaos afterwards.
The real issue isn’t that we don’t have enough space, it’s that we’re using our space inefficiently. Traditional stacking works against us rather than with us, creating more hassle than it saves.
The Vertical Filing Solution
Here’s the game changer: stop stacking your baking trays horizontally and start storing them vertically, like files in a filing cabinet. This simple switch transforms everything because you can slide out exactly what you need without disturbing anything else.
You can create vertical storage using adjustable shelf dividers, which are available at most home stores for under a tenner. These little metal or plastic dividers slot between your existing shelves and create individual slots for each tray. Suddenly, your wobbly tower becomes an organised system where everything has its place.
For an even cheaper solution, you can repurpose a large plastic magazine holder. Turn it on its side, and you’ve got instant vertical storage for your smaller baking sheets and cutting boards. If you’ve got deeper cupboards, consider using a dish rack turned sideways, which creates multiple vertical slots at different heights.
The beauty of vertical storage is that it works with whatever space you have. Whether you’ve got a narrow cupboard or a deep pantry, you can adapt this system to fit your kitchen perfectly.
Use The Inside Of Cupboard Doors
Your cupboard doors are prime real estate that most people completely ignore. Installing slim racks or hooks on the inside of your cupboard doors gives you extra storage without taking up any shelf space. This is particularly brilliant for lightweight items like cooling racks, splatter screens, and smaller baking sheets.
You can find over the door organisers specifically designed for kitchen storage, or you can create your own system using simple hooks and narrow wire racks. The key is to choose lightweight organisers that won’t put too much stress on your cupboard hinges.
For renters who can’t drill holes, there are adhesive hooks and hanging organisers that work just as well. Just make sure the surface is clean and dry before applying them, and choose products rated for the weight you plan to hang.
This solution works especially well for items you use regularly because they’re instantly visible and accessible the moment you open the cupboard door.
Group By Frequency Of Use
Not all baking trays are created equal, and they definitely don’t deserve equal treatment in your storage system. The secret is organising by how often you actually use each item rather than trying to fit everything into the same space.
Your everyday baking sheets deserve the VIP treatment. Store them at eye level or just below, where you can grab them without stretching or crouching. These are your workhorses, the ones that come out for everything from roasting vegetables to reheating pizza.
Heavy roasting tins and casserole dishes belong in lower cupboards. Not only does this make sense from a weight perspective, but these items typically get used for weekend cooking or special occasions when you’ve got more time to bend down and retrieve them.
Specialty items like springform cake tins, muffin trays, and pastry equipment can live in those harder to reach spots. Since you only use them occasionally, it’s worth sacrificing convenience for the storage space. Just make sure they’re still accessible when inspiration strikes for a Sunday bake.
The Tension Rod Trick
Here’s a clever solution that costs less than five pounds and takes minutes to install: tension rods. You can use them to create instant dividers in your cupboards without any drilling or permanent changes.
Install a tension rod vertically between your cupboard shelves to create a barrier that stops your trays from sliding around. You can also use them horizontally to create additional shelf levels, effectively doubling your storage space. For deeper cupboards, install multiple tension rods to create several vertical slots.
The brilliant thing about tension rods is that they’re completely adjustable. If you get new cookware or rearrange your kitchen, you can easily move them around. They also work in awkward spaces where traditional organisers might not fit properly.
This solution is particularly great for renters because there’s no damage to the cupboards, and you can take your organisers with you when you move.
Store Lids Separately
One of the biggest mistakes people make is trying to store lids with their corresponding pots and pans. This creates wobbly, unstable stacks that are impossible to navigate. Instead, dedicate a separate area specifically for lids.
A narrow vertical slot is perfect for storing lids on their edge, similar to the filing system we discussed for baking trays. You can create this using shelf dividers or even a simple magazine holder. This keeps lids organised and prevents the frustrating hunt for the right size when you need it.
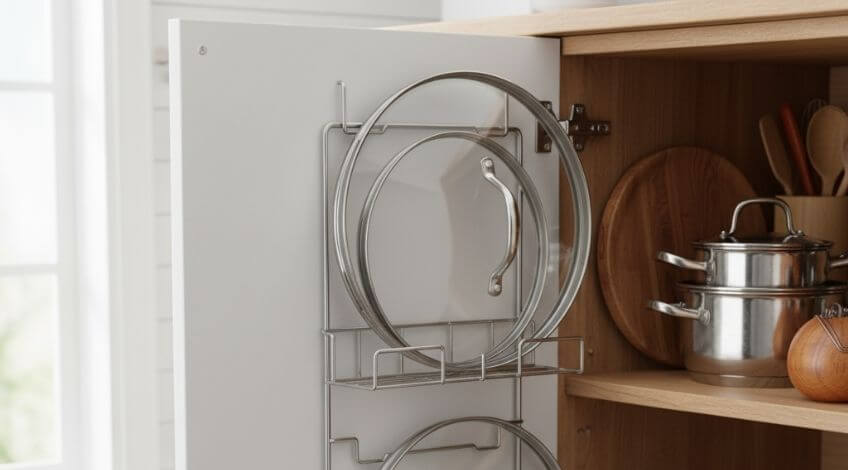
For pot lids specifically, consider installing a rack on the inside of a cupboard door. This keeps them visible and accessible while freeing up valuable shelf space for other items. Some people find that a simple towel bar installed inside a cupboard door works perfectly for hanging lids by their handles.
Separating lids from their bases might feel counterintuitive at first, but once you get used to the system, you’ll wonder why you ever tried to store them together.
Make Use Of Wasted Vertical Space
Most cupboards have loads of unused space above the items we store, and this vertical space is perfect for creating additional storage levels. You can install additional shelves, use stackable shelf organisers, or even hang items from the top of the cupboard.
Stackable shelf organisers essentially create a second level within your existing cupboard space. They’re particularly useful for items like plates and bowls, freeing up space elsewhere for your baking trays. Look for ones with legs that are tall enough to accommodate your existing items underneath.
For very tall cupboards, consider using the space near the ceiling for items you don’t use frequently. This might be holiday baking equipment, special occasion serving dishes, or backup storage containers. A small step stool makes these items accessible when needed without cluttering your everyday storage space.
The key is to make sure you can still reach everything safely. If you need a proper ladder to access something, it’s probably too high and should be stored elsewhere.
Drawer Dividers For Small Items
If you’re lucky enough to have deep kitchen drawers, they can be fantastic for baking tray storage. The key is using dividers to prevent everything from sliding around and becoming a jumbled mess every time you open the drawer.
Adjustable drawer dividers let you create custom sized compartments for different items. You can have one section for baking sheets, another for cooling racks and a third for smaller items like muffin tins. Everything stays in its place and you can see what you have at a glance.
For drawers that aren’t quite deep enough for full size baking sheets, use them for smaller items that often get lost in cupboards. Things like pastry brushes, measuring spoons and small cake pans have a tendency to disappear in the back of cupboards, but they’re perfectly visible and accessible in a drawer.
Even if your drawers aren’t perfect for baking equipment, using them effectively for other items frees up cupboard space for your trays and pans.
The Rolling Cart Solution
Sometimes the best storage solution is to create more storage rather than trying to work within existing constraints. A rolling kitchen cart can provide dedicated space for all your baking equipment while keeping it easily accessible.
Look for carts with multiple shelves and consider ones with towel bars or hooks on the sides for additional hanging storage. You can keep your most used items on the cart and store it in a convenient corner of your kitchen or even in a nearby pantry.
The mobility is a huge advantage because you can roll the cart closer to your workspace when you’re baking, then tuck it out of the way when you’re done. This is particularly helpful in smaller kitchens where counter space is at a premium.
Some people worry that a cart will make their kitchen look cluttered, but a well organised cart actually looks more intentional and tidy than overflowing cupboards with doors that won’t close properly.
Labelling Your New System
Once you’ve set up your new organisation system, labelling helps maintain it over time. This is especially important if you share your kitchen with family members or flatmates who need to know where things belong.
Simple labels on shelf edges or inside cupboard doors can prevent people from randomly shoving items back in the wrong spots. You don’t need fancy labelling systems, even masking tape and a marker will do the job perfectly well.
TIP: For families with children, picture labels can be helpful so even non readers can put things away correctly. Take photos of how each area should look when properly organised, and tape them inside the relevant cupboards.
The key is to make your system so obvious and simple that putting things away correctly becomes automatic rather than a chore.
No More Kitchen Chaos
Organising your baking trays properly isn’t about having an Instagram worthy kitchen, it’s about making your daily cooking routine less stressful and more enjoyable. When you can grab what you need quickly and safely, without playing cupboard Jenga, cooking becomes more pleasant and you’re more likely to actually use all that lovely bakeware you own.
The best part about these solutions is that most of them cost very little and can be implemented gradually. You don’t need to overhaul your entire kitchen in one weekend. Start with one cupboard and one solution, then expand your system as you see what works best for your space and cooking style.
Remember, the perfect organisation system is the one you’ll actually use consistently. Choose solutions that fit your lifestyle and your space, not just what looks good in photos. Your future self will thank you every time you open that cupboard door and find exactly what you need, right where you left it!
SEE ALSO: The Right Way To Store Your Winter Boots (So They Don’t Smell Or Crack)
Also, follow us on Pinterest ...