
This DIY Degreaser Saves You Money and Cleans Like Magic
Tired of spending a fortune on expensive degreasers that promise the world but leave your wallet empty and your surfaces still greasy? You’re not alone. Between rising costs and concerns about harsh chemicals in store bought cleaners, many of us are looking for better alternatives that actually work.
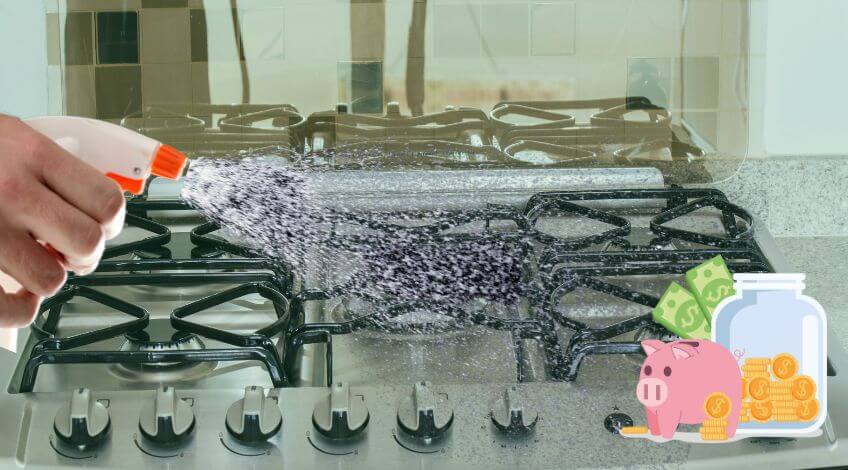
Here’s the brilliant news: you can create a powerful degreaser using ingredients you already have in your kitchen cupboard, and it works just as well as those pricey shop bought versions. This homemade solution costs pennies to make, contains no mysterious chemicals, and tackles even the toughest grease stains with impressive results.
Whether you’re dealing with splattered stovetops after Sunday roast prep, grimy oven doors, or stubborn grease marks on kitchen cabinets, this natural degreaser will become your new cleaning hero. Let’s show you exactly how to make and use this wallet friendly wonder cleaner.
Why Make Your Own Degreaser?
Commercial degreasers can cost anywhere from £3 to £8 per bottle, and if you’re dealing with regular cooking messes, you’ll go through them quickly.
This DIY degreaser costs under £1 to make and gives you the same deep clean as expensive store bought versions. With ingredients you’ll use for other cleaning jobs too, it’s one of the most affordable and effective swaps you can make.
There’s also the peace of mind factor. When you make your own cleaner, you know exactly what’s going into it. No unpronounceable chemicals, no warnings about keeping away from children and pets, and no concerns about chemical residues on surfaces where you prepare food.
What You’ll Need For Your DIY Degreaser
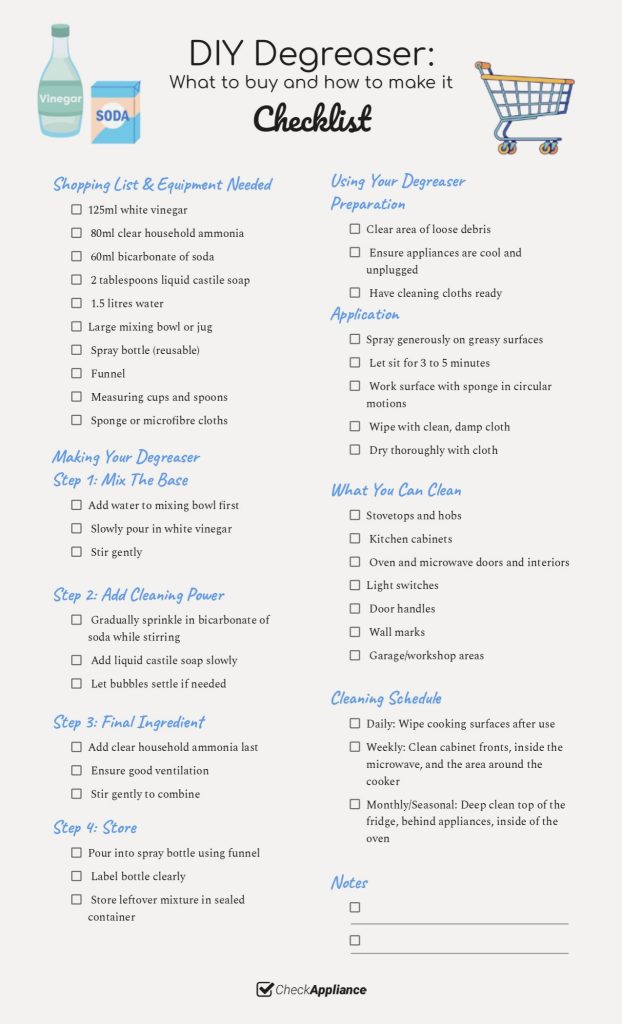
Here’s your complete shopping list for this money saving degreaser. The brilliant thing is you probably already have most of these ingredients at home:
Essential Ingredients:
- 125ml white vinegar
- 80ml clear household ammonia
- 60ml bicarbonate of soda
- 2 tablespoons liquid castile soap
- 1.5 litres water
Equipment You’ll Need:
- Large mixing bowl or jug
- Spray bottle (reusable ones work perfectly)
- Funnel (or steady hands!)
- Measuring cups and spoons
- Sponge or microfibre cloths for application
Most of these ingredients are kitchen staples, so you’re not investing in anything you won’t use elsewhere. Castile soap might be the only new purchase, but one bottle lasts for months of degreaser making.
How To Make Your Money Saving Degreaser
This recipe is wonderfully straightforward, perfect for busy households that need effective solutions without complicated processes.
Step 1: Mix The Base
Start with your large mixing bowl or jug. Add the water first, this helps prevent foaming when you add the other ingredients. Always add water first to avoid creating too many bubbles that make measuring difficult.
Next, slowly pour in the white vinegar. The vinegar smell will be quite strong at first, but don’t worry, this fades once the degreaser is mixed and applied.
Step 2: Add The Cleaning Power
Sprinkle in the bicarbonate of soda gradually while stirring gently. You’ll notice some fizzing as it reacts with the vinegar, this is perfectly normal and actually helps create the cleaning action.
Add the liquid castile soap last, stirring it in slowly to avoid creating excessive foam. If you do get a lot of bubbles, just let the mixture sit for a few minutes until they settle.
Step 3: Include The Ammonia
Add the clear household ammonia last and stir gently. This ingredient really boosts the degreasing power, but make sure your area is well ventilated when mixing. The smell dissipates quickly once everything is combined.
Step 4: Transfer And Store
Using your funnel, carefully pour the mixture into your spray bottle. Label it clearly so everyone in the household knows what it is. Store any leftover mixture in a sealed container for future refills.
How To Use Your Homemade Degreaser
The application method makes all the difference in getting professional quality results from your homemade cleaner.
Prep Your Surfaces
Before you start degreasing, clear the area and remove any loose debris. Wipe away crumbs, food particles, or anything that isn’t actually stuck on grease. This prevents you from just pushing mess around rather than cleaning it properly.
For kitchen appliances, make sure they’re cool and unplugged if necessary. You don’t want to be spraying electrical components while they’re hot or connected to power.
Apply The Degreaser
Spray the solution generously onto greasy surfaces, making sure to cover the entire affected area. Don’t be stingy with the application, thorough coverage is key to effective degreasing.
Let the degreaser sit for 3 to 5 minutes. This dwell time is crucial because it allows the ingredients to break down the grease properly. Stubborn or thick grease might need the full 5 minutes, while light splashes may only need 3 minutes.
Work The Surface
Using a clean sponge or microfibre cloth, gently rub the treated area. You should notice the grease starting to lift and emulsify. Work in circular motions for best results, applying gentle pressure rather than scrubbing aggressively.
For really stubborn spots, you might need to spray again and let it sit for another few minutes before working the surface again.
Rinse And Dry
Wipe down the surface with a clean, damp cloth to remove any degreaser residue. Then dry thoroughly with a clean tea towel or paper towels. This final step ensures you don’t leave any cleaning solution behind that might attract dirt later.
What This DIY Degreaser Can Clean
You’ll be amazed at how versatile this homemade solution is. It’s perfect for regular kitchen maintenance and can handle surprising cleaning challenges throughout your home.
Kitchen Surfaces
Stovetops and hobs respond brilliantly to this degreaser. It cuts through cooking splashes and baked on food residues without damaging surfaces. Use it on gas hobs, electric rings, and even induction cooktops.
Kitchen cabinets, especially those near the cooker, accumulate greasy film over time. This degreaser removes that sticky buildup that makes cabinet doors feel unpleasant to touch.
Oven doors and interiors benefit from this treatment too. The natural ingredients won’t leave harsh chemical smells that might affect your food.
Beyond The Kitchen
This degreaser works surprisingly well on greasy marks throughout the house. Light switches, door handles, and wall areas around frequently used spaces can develop greasy fingerprints that regular cleaners struggle with.
Garage and workshop areas where you might have oil or grease spills also respond well to this natural solution. It’s much safer than harsh solvents in enclosed spaces.
The Science Behind Natural Degreasing
Understanding why this homemade degreaser works so well helps you use it more effectively. Grease and oil are stubborn because they don’t mix with water alone. That’s where our carefully chosen ingredients come in.
White vinegar contains acetic acid, which breaks down grease molecules and cuts through built up grime. The acid literally dissolves the bonds that hold grease to surfaces, making it easy to wipe away. It’s the same principle used in expensive commercial degreasers, just without the hefty price tag.
Bicarbonate of soda works differently but equally effectively. It’s mildly abrasive, which helps scrub away stubborn deposits, and it’s alkaline, which neutralises acidic food residues and helps lift grease stains. When combined with other ingredients, it creates a powerful cleaning reaction.
The liquid castile soap acts as a surfactant, which means it helps water and oil mix together. This allows the degreaser to lift grease away from surfaces rather than just pushing it around.
Safety Considerations For Your Peace Of Mind
While this natural degreaser is much safer than commercial alternatives, a few sensible precautions ensure safe and effective use.
Ventilation And Application
Always use your degreaser in well ventilated areas. Open windows or turn on extractor fans, especially when working in small spaces like utility rooms or pantries.

The ammonia, while diluted, can still be strong smelling initially. Good airflow helps dissipate any odours quickly and makes the cleaning process more pleasant.
Keep Away From Children And Pets
Even though the ingredients are natural, the concentrated mixture should still be stored safely away from curious children and pets. Label containers clearly and store in high cupboards or locked cleaning cabinets.
If anyone does accidentally ingest the mixture, the natural ingredients mean it’s much less concerning than commercial cleaners, but still seek medical advice if needed.
Test On Small Areas First
Before using your degreaser on expensive or delicate surfaces, test it on a small, hidden area first. While the ingredients are gentle, some finishes or materials might react unexpectedly.
This is particularly important for painted surfaces, natural stone, or antique pieces where any discolouration would be problematic.
Making Degreasing Part Of Your Routine
The key to keeping your home grease free without spending hours cleaning is making degreasing a regular, quick task rather than a major project.
Daily Prevention
Wipe down cooking surfaces with your homemade degreaser immediately after cooking. When grease is fresh, it lifts away easily and doesn’t have time to build up into stubborn deposits.
Keep a spray bottle of degreaser in your kitchen so it’s always handy for quick cleanups. This prevents small messes from becoming major cleaning jobs.
Weekly Deep Cleaning
Once a week, tackle areas that accumulate grease gradually: the area around your cooker, cabinet fronts near cooking areas, and the inside of your microwave. Regular attention with your natural degreaser keeps these areas manageable.
This weekly routine takes just 15 to 20 minutes but prevents the need for major scrubbing sessions later.
Seasonal Overhauls
Every few months, use your degreaser for a thorough kitchen deep clean. This includes areas you might not clean regularly: the top of your fridge, behind appliances, and inside your oven.
Your homemade degreaser is so economical that you can use it generously for these bigger jobs without worrying about the cost.
Your Path To Cleaner Surfaces And Fuller Wallets
Creating your own effective degreaser really is this simple. Five basic ingredients, a few minutes of mixing, and you’ve got a powerful cleaning solution that rivals expensive commercial products at a fraction of the cost.
Start with one batch and see the difference it makes to your cleaning routine and your household budget. Once you experience how well this DIY degreaser works, you’ll wonder why you ever bought expensive alternatives.
DOWNLOAD THE FREE DIY DEGREASER CHECKLIST HERE
Share this money saving tip with friends and family who are also looking to cut costs without compromising on cleanliness. In these times of rising prices, every little saving helps, and this one actually improves your cleaning results too!
SEE ALSO: Your Home Could Look Cleaner Instantly If You Ditch These Paint Shades!
Also, follow us on Pinterest ...


