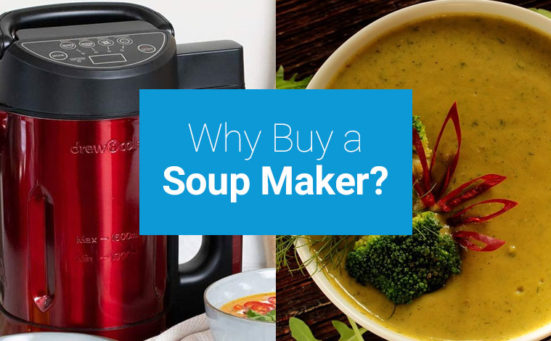
How To Make Soup In A Soup Maker
So, Amazon has delivered your parcel, you open the cardboard box and inside is your soup maker. After that initial excitement you want to crack on and make some soup, but you don’t have a whole load of time to read through the entire instruction manual.
That’s why we put this post together, here you’ll find all you need to know, to create amazing soups in your soup maker in just 20 to 30 minutes. We’ll cover all the basics and show you the easiest recipes for making classic soup dishes. Here comes our table of contents, we’d prefer it if you read the whole article, but if time is an issue, just jump to the relevant section.
How To Use A Soup Maker
It really is so simple to make soup in a soup maker, but we’ve put together this easy to follow guide so there’s no confusion.
Making Soup In A Soup Maker In 8 Easy Steps
This really is a doddle, do it once, and you’ll never need to read these instructions again.
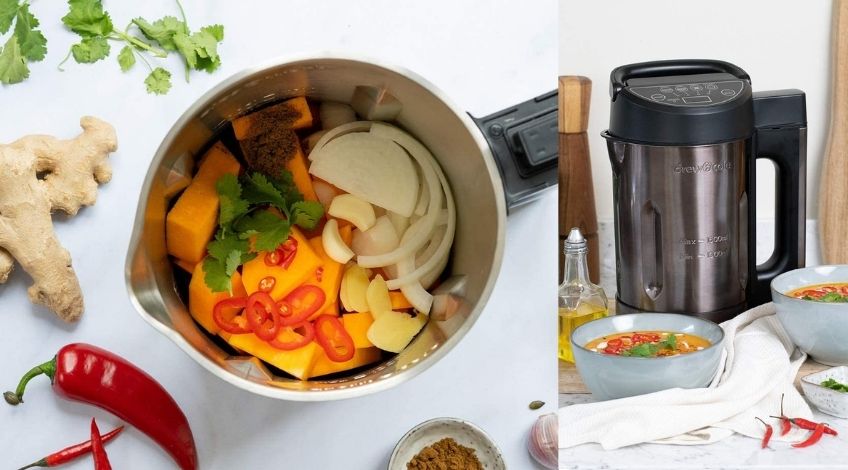
- Peel and chop the vegetables
Remove the skin from carrots, onions, swede, parsnips, etc, then chop all ingredients into fairly small cubes. - Pour ½ of the hot water into the soup maker
This is to prevent any of the ingredients sticking to the bottom of the soup maker or burning. - Add the chopped ingredients
Add all of the vegetables, any cooked meat, herbs for flavouring, stock cubes etc. - Pour in the rest of the water
Remember to only fill to the maximum line on your soup maker. - Replace the lid
Be sure the lid is on correctly and fits snugly in place. - Select setting
Press the button for chunky or smooth after ensuring the plug is connected and switched on. - Allow the cycle to complete
After the soup maker has finished cooking, remove the lid, taste the soup and add any seasoning required. At this stage you can add one of the thickening ingredients (see below). - Enjoy your meal.
That really is all there is to it.
Most recipes for making soup in a soup maker, make enough for 4 people. Due to the design of the machine, it’s not usually possible to lower the ingredients and get a good soup. So just freeze the extra soup in one portion containers or store in the fridge.
Fresh soup can be stored safely in the fridge for 3 to 4 days. To reheat either pour into a saucepan, or microwave. Ensure frozen soup is fully thawed before reheating.
How Does A Soup Maker Work?
Most soup makers look like electric kettles, even the size is similar. They also use the base to contain the heating element like a kettle. The difference is in the lid, there’s a rotating blade attached to the underside of the lid. This blade chops the contents in the same way a blender blade does.
In fact, that’s the best way to describe a soup maker, it’s like a cross between an electric kettle and a blender. Assuming you’ve purchased a soup maker from a well known brand, you should have an instruction manual supplied with it, or access to an online version. These manuals are great, if sometimes being guilty of being too wordy.
So, before we get too wordy, a soup maker is a cross between a blender and an electric kettle, that you put all the ingredients into, select the function (chunky or smooth), press the button and in around 25 minutes you have perfect soup every time.
What Can You Put In A Soup Maker?
At first glance this looks like a stupid question, it’s a soup maker, you put soup ingredients in it, right? Well, yes but, there are limitations, like, most soup makers don’t allow raw meat to be added, presumably because the liquid doesn’t get hot enough to cook the meat or deal with any bacteria. Also adding thick substances like tomato puree can cause the bottom of the soup maker to burn.
So what can you put in a soup maker? Here’s a basics list.
- Vegetables
It’s fine to put all vegetables into a soup maker, but they should be peeled and chopped beforehand. - Cooked meats
Any meats should be pre-cooked before adding to the soup maker, this is great for leftovers like beef, chicken, ham etc. Some soup makers have the facility to cook raw meat, but this is usually limited to no more than 200 grams (check your manual). - Stock
Homemade stock is best, but you can add store bought stocks or even stock cubes but remember to adjust any salt addition if you use a store bought stock. - Water
To prevent foods burning or sticking to the bottom of the soup maker, we recommend adding half of the water or stock before adding the other ingredients and topping up with the other half after everything has been added. On the subject of water, to help the vegetables to cook properly we have found it best to use boiling , or at least hot water in a soup maker. - Frozen peas
Some recipes call for the addition of frozen peas, usually not that many to be fair, but take care when adding anything frozen to the soup maker, you run the risk of damaging, or at the very least blunting the blades. We don’t advise adding anything other than a few frozen peas to the soup maker. - Frozen fruit
When using the soup maker to make smoothies, it’s fine to add some frozen berries etc, as these are quite soft even when frozen. But don’t be adding any hard fruits that have been frozen like apples, pears etc. It’s fine to use fresh hard-fruits but we don’t advise using frozen.
Is It OK To Use Thickening Agents In A Soup Maker?
If your soup is too thin, you can add ingredients to thicken it, but do this after the soup has been made. Then return to the soup maker and heat for a few minutes. To thicken your soup add one of the following.
- Cornflour
Mix 1 teaspoon of cornflour with a splash of water or milk, and stir this paste into your hot soup until it thickens up. - Thickening granules
Follow the instructions on the packet. - Instant mash powder
Add a few spoonfuls of instant mash and stir into the hot soup. - Cheese
Sprinkle some grated cheese of your choice into the soup, this will thicken the liquid and add flavour. - Yoghurt
After the soup has finished cooking stir in some yoghurt to thicken. - Tomato puree
Tomato puree should only be added after soup has finished cooking as it can cause sticking or burning at the bottom of the soup maker if it’s added in the original cooking recipe. Simply stir it in to thicken tomato or vegetable soups. - Cream
We find double cream works best, just stir into hot soup. - Crème fraiche
If you’re watching your calorie intake, crème fraiche is a low calorie alternative to cream.
There are a few ingredients that will thicken soups whilst they are cooking, these include:
- Starchy vegetables
Like potatoes, yams, sweet potatoes, etc - Pulses
Like lentils, split peas, butter beans, broad beans, baked beans, etc - Grains
Like barley, rice, pasta, etc
How Small Do The Vegetable Pieces Need To Be For Cooking In A Soup Maker?
We find it best to cut vegetables into cubes, of about one inch (2.5 cm) to ensure even cooking in the soup maker. If you like chunky soup, this is the ideal size for cooking the vegetables to perfection. If you prefer smooth soups, these will be cooked perfectly and then chopped by the blades.
For potato lovers, who prefer larger chunks, you can increase to 1 ½ inch (3.8 cms) but check they are cooked soft enough before serving.
Frequently Asked Questions
You don’t have to cook veg before putting it in the soup maker, but it’s advisable to use hot water as your liquid. This will ensure the vegetables get fully cooked in the soup maker’s time frame for cooking.
You can put raw meat in some soup makers but not all. Check in your hand book for more information.
To clean a burnt soup maker, mix washing powder with hot water and leave it in the soup maker to soak overnight. Then wipe off with a non-scratch cloth. If it doesn’t work the first time re-apply and try again.
You can use hot or cold water in a soup maker but we find using hot (not boiling) water tends to get the vegetables to the right consistency when cooked.
A soup maker is worth buying, if you enjoy home-made soup, don’t have much time, and don’t like washing up.
Soup makers don’t chop veg, but they can blend the chopped vegetables into a smooth soup.
Your soup maker has probably cut out because you have over filled it. Never fill above the filler line.
Also, follow us on Pinterest ...