

If You’ve Never Cleaned Your Fridge Coils, This Might Scare You
When did you last clean your fridge coils? If you’re standing there thinking “my what now?”, you’re not alone. Most people religiously wipe down their fridge shelves and throw out expired yoghurt, but completely forget about the hidden parts that actually keep everything cold. Here’s the thing that might genuinely shock you: those neglected coils could be costing you hundreds of pounds and dramatically shortening your fridge’s lifespan.
The brutal truth? Dirty coils make your fridge work up to 25% harder, pushing your energy bills through the roof and bringing you dangerously close to a complete appliance breakdown. But here’s the brilliant news: this is one of the easiest maintenance tasks you’ll ever tackle, and it could save you from an expensive emergency repair call when you can least afford it.
What Are Fridge Coils And Why Should You Care?
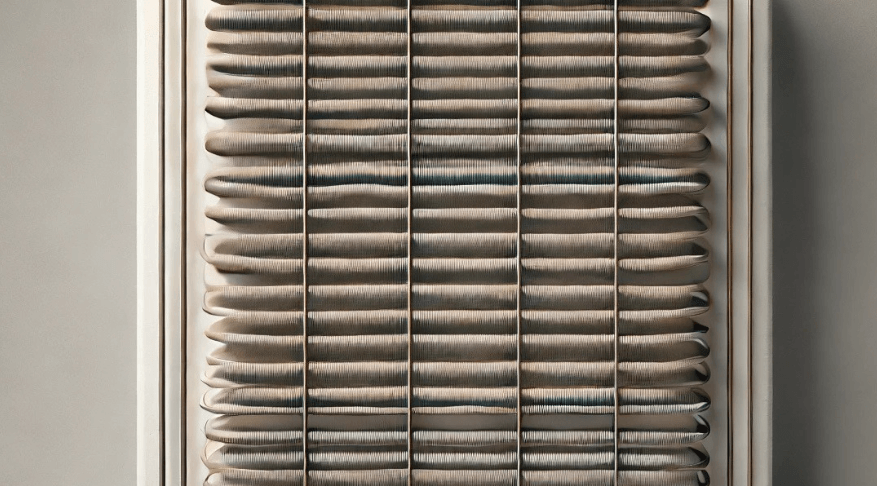
Think of your fridge coils as the lungs of your appliance. These vital components, officially called condenser coils, are responsible for releasing heat from inside your fridge to keep everything properly chilled. Without them working efficiently, your fridge becomes a very expensive cupboard.
The coils work by allowing refrigerant to flow through them, removing heat from inside the fridge and releasing it outside. This process happens constantly, 24 hours a day, which means these hardworking coils are always collecting dust, pet hair, grease, and whatever else is floating around your kitchen.
Here’s where it gets scary: when coils are clogged with dirt and debris, your fridge has to work overtime to maintain the right temperature. This extra strain doesn’t just push up your electricity bill, it puts enormous stress on the compressor, which is essentially the heart of your refrigerator. When that fails, you’re looking at either a massive repair bill or having to replace the entire appliance.
For those learning proper appliance maintenance, understanding your coils is absolutely crucial. This one simple task can prevent the majority of fridge related problems and extend your appliance’s life by years.
The Hidden Cost Of Dirty Coils
Most people have no idea how much money dirty coils are quietly stealing from their bank account every month. When coils are clogged, your fridge’s energy consumption can increase by 15 to 25%, which translates to real money on your electricity bill.
But the financial impact goes far beyond monthly energy costs. Dirty coils are the leading cause of premature compressor failure, and replacing a compressor typically costs between £300 to £600, assuming your fridge is even worth repairing. Many repair technicians will tell you that when the compressor goes on an older fridge, it’s more economical to buy a new appliance entirely.
For busy households that rely heavily on their fridge and freezer, the inconvenience factor is enormous. Imagine losing all your frozen food during a family holiday or having to eat takeaways for a week whilst waiting for a repair appointment. These scenarios are incredibly common and almost always preventable with basic coil maintenance.
The most frustrating part? This entirely avoidable expense often hits families when money is already tight. Christmas, summer holidays, or back to school season, expensive appliance failures never happen at convenient times.
Where To Find Your Fridge Coils
Before you can clean your coils, you need to locate them, and this varies depending on your fridge model. Don’t worry, they’re not playing hide and seek, but they’re definitely not obvious either.
- Most modern fridges have coils located behind a removable grille at the bottom front of the appliance. This grille usually pops off with gentle pressure or might require removing a couple of screws. Look for a plastic panel running along the bottom edge of your fridge, this is probably covering your coils.
- Older fridge models often have coils mounted on the back of the appliance. If you can see black metal coils that look like a radiator when you peek behind your fridge, that’s them! These are typically easier to access but require pulling the fridge away from the wall.
- Some premium models hide the coils on top of the fridge, under a removable panel. Check your owner’s manual or look for any removable panels if you can’t find coils at the bottom or back.
If you’re still struggling to locate your coils, check the manufacturer’s website or search for your model number online. Trust me, they’re definitely there somewhere, and finding them is half the battle won.
Essential Tools For Professional Results
Gather your supplies before starting, this makes the entire process much smoother and ensures you don’t have to stop halfway through to hunt for equipment.
- A vacuum cleaner with brush attachment is absolutely essential. The brush attachment is crucial because it’s gentle enough not to damage the delicate coil fins whilst still being effective at removing stubborn debris. Don’t use the regular vacuum head, it’s too aggressive and could bend the coils.
- A refrigerator coil brush is a brilliant investment if you want professional results. These long, narrow brushes are specifically designed to reach between coil fins and remove debris that vacuum attachments might miss. You can find them at most hardware stores or online for under £10.
- A screwdriver set might be needed to remove access panels or grilles. Have both flathead and Phillips head screwdrivers handy, as different manufacturers use different types of screws.
- Cleaning cloths and warm soapy water for wiping down the grille and surrounding areas. This isn’t just about the coils themselves, the entire area benefits from a proper clean.
- A torch or phone light is incredibly helpful for seeing what you’re doing, especially if your coils are in a dark, cramped space behind or under the fridge.
Step By Step Coil Cleaning Process
This process typically takes 15 to 30 minutes and could save you hundreds of pounds in repairs and energy costs. The time investment is absolutely worth it.
Safety First: Unplug Your Fridge
Always unplug your refrigerator before starting any maintenance work. This protects both you and the appliance from potential electrical issues. Don’t worry about your food, the fridge will stay cold for several hours with the door closed, and this cleaning process is quick enough that nothing will spoil.

Pull the plug from the wall socket and wait a few minutes before beginning. This gives the electrical components time to completely power down.
Access The Coils
For bottom mounted coils, remove the front grille by either popping it off or unscrewing it, depending on your model. The grille should come away easily, if you’re having to force it, double check for hidden screws or clips.
For rear mounted coils, carefully pull your fridge away from the wall. You’ll need enough space to comfortably work behind the appliance. Be gentle and watch out for the power cord and any water lines if you have an ice maker.
Take a moment to examine the coils once you’ve accessed them. You might be shocked by what you find! Years of accumulated dust, pet hair, and kitchen grease create a thick, insulating layer that dramatically reduces efficiency.
Remove Loose Debris
Start with your vacuum’s brush attachment to remove loose dust and debris. Work systematically from top to bottom, taking care not to press too hard against the delicate coil fins. These fins are made of thin metal and can bend easily, so gentle pressure is key.
Pay particular attention to areas where debris tends to accumulate, typically the bottom sections and any horizontal surfaces. Don’t be surprised if you vacuum up an alarming amount of dust and hair, this is completely normal for coils that haven’t been cleaned regularly.
Deep Clean With A Coil Brush
After vacuuming, use your coil brush to remove stubborn debris that’s stuck between the fins. Work the brush gently between the coil sections, moving in the same direction as the fins to avoid bending them.
This step reveals how much additional debris was hiding in hard to reach areas. The coil brush can access spaces that vacuum attachments simply cannot reach, making it an invaluable tool for thorough cleaning.
If you don’t have a coil brush, a clean paintbrush can work as a substitute, though it won’t be quite as effective as the purpose built tool.
Final Vacuum And Inspection
Once you’ve brushed the coils thoroughly, vacuum again to remove any debris you’ve loosened. This final vacuum ensures you’ve removed everything possible and leaves the coils looking dramatically different.
Take a moment to inspect your work. Clean coils should look noticeably brighter and you should be able to see clearly between the individual fins. If some areas still look clogged, repeat the brushing and vacuuming process.
Clean The Surrounding Area
Don’t forget to clean the grille and surrounding floor area. Years of debris falling from dirty coils often creates a mess in the area around your fridge. Wipe down the grille with warm soapy water and vacuum the floor thoroughly.
This final step makes a surprising difference to how clean and well maintained your kitchen looks overall.
How Often Should You Clean Your Fridge Coils?
The frequency of coil cleaning depends heavily on your household situation, but there are some clear guidelines that can help you create a proper maintenance schedule.
For most households, cleaning coils every six months is perfectly adequate. This frequency prevents significant buildup whilst not being overly demanding on your time. Mark it in your calendar alongside other seasonal maintenance tasks like changing smoke detector batteries.
Pet owners need to clean more frequently, ideally every three to four months. Pet hair is particularly problematic for fridge coils because it creates a thick, insulating mat that’s extremely effective at blocking airflow. If you have multiple pets or pets that shed heavily, you might need to clean even more often.
Dusty environments require more frequent cleaning. If your kitchen gets particularly dusty, if you do a lot of cooking that creates grease in the air, or if your fridge is located in a garage or utility room, plan on cleaning every three months.
Busy families who forget about appliance maintenance should set smartphone reminders or include coil cleaning in their regular deep cleaning routine. Forgetting this task for years is incredibly common, but the consequences are far too expensive to ignore.
The good news is that once you’ve established a regular cleaning routine, subsequent cleanings become much quicker and easier because debris doesn’t have time to build up significantly.
Warning Signs Your Coils Need Immediate Attention
Sometimes life gets in the way and routine maintenance gets forgotten. Here are the warning signs that your coils are crying out for attention and could be causing expensive damage right now.
Your Fridge Is Running Constantly
If your fridge is cycling on and off much more frequently than usual, severely clogged coils are often the culprit. When coils are blocked, the fridge cannot maintain proper temperature efficiently, causing the compressor to work overtime trying to keep things cold.
Rising Electricity Bills Without Explanation
If your energy usage has crept up steadily over several months and you can’t explain why, dirty coils could be stealing money from your account. This is particularly noticeable in summer when the fridge already works harder due to higher ambient temperatures.
Food Spoiling Faster Than Normal
When the cooling system is struggling due to dirty coils, temperature regulation becomes erratic, leading to premature food spoilage and frustrating waste. Inconsistent temperatures inside the fridge are a clear sign that your cooling system is under strain.
Unusual Noises From Your Appliance
Pay attention to grinding, clicking, or humming sounds that seem louder than usual. An overworked compressor often makes more noise as it struggles to maintain proper cooling, and these sounds are early warning signs of potential failure.
Excessive Heat From The Fridge Exterior
While some warmth is normal, if the back or sides of your fridge feel unusually hot to the touch, this indicates the appliance is working much harder than it should be. This excess heat often signals that dirty coils are preventing proper heat dissipation.
If you’re experiencing any of these symptoms, cleaning your coils should be your first troubleshooting step. It’s free, takes less than an hour, and often resolves the problem completely.
Save Money And Avoid Appliance Disasters
Regular coil maintenance is honestly one of the best investments you can make in your home. The 30 minutes you spend cleaning coils twice a year can literally save you hundreds of pounds and extend your fridge’s life by several years.
Remember, appliance failures never happen at convenient times, and emergency repair calls always cost significantly more than routine maintenance. By taking control of this simple task, you’re protecting yourself from unexpected expenses and ensuring your family’s food stays properly preserved.
The next time you’re planning your seasonal cleaning tasks, add coil cleaning to the list. Your electricity bill, your wallet, and your future self will thank you for taking this proactive step towards proper home maintenance.
Think your friends could benefit from avoiding expensive fridge repairs? Share this article on Facebook or send it to your family group chat. Everyone deserves to know how easy it is to prevent costly appliance disasters!
SEE ALSO: Drinking Tea Every Day? Here’s Why You Should (or Shouldn’t) Keep It Up!
Also, follow us on Pinterest ...


