
The Right Way To Grease A Cake Pan
Is there anything more disappointing than spending hours baking the perfect cake, only to have half of it stick to the pan when you try to turn it out? We’ve all been there! The good news is that properly greasing your cake tin is a simple skill that anyone can master, and it makes all the difference between cake triumph and cake tragedy.
If you’re keen on fuss free baking with guaranteed results, follow our expert guide to greasing cake tins the right way. These straightforward techniques will ensure your bakes release perfectly every time, with minimal mess and maximum success!
Essential Tools For Perfect Greasing
Before you begin, gather these basic items:
- Cake tin (check your recipe for the correct size and shape)
- Butter, shortening, or cooking spray
- Plain flour
- Parchment paper
- Kitchen paper (in a pinch)
For those who prefer convenience with reliable results, there are also cooking sprays with flour already incorporated, such as Baker’s Joy, which combine two steps into one.
The Foolproof Method For Standard Cake Tins
Let us walk through the perfect method for preparing your cake tins, broken down into simple steps that ensure success every time!
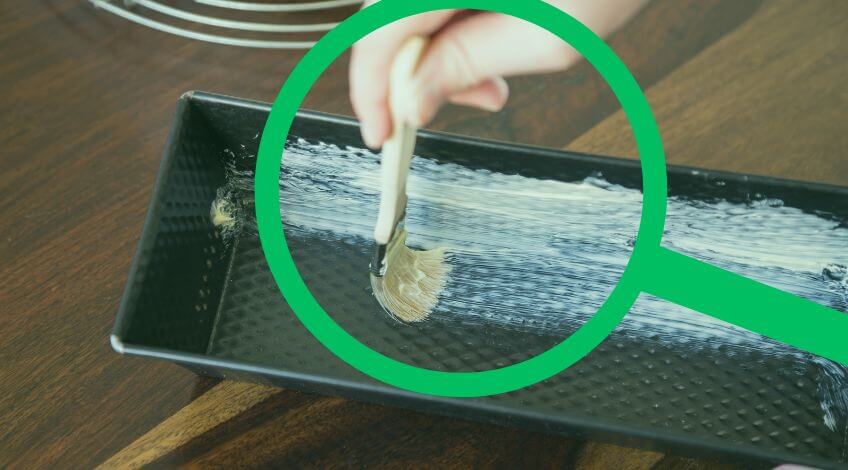
Step 1: Apply Your Grease Generously
Start by tearing a square of parchment paper or kitchen paper if that’s what you have on hand. Put a generous dollop of butter or shortening on one side and hold the opposite side to keep your fingers clean.
Thoroughly coat every inch of the inside of your tin with grease, including the bottom, sides and especially the corners where cake is most likely to stick. Don’t be stingy here! A proper coating is essential for easy release.
If you’re using spray oil, the process is even simpler! Just spray liberally across all interior surfaces of the tin. For sprays with flour already incorporated, you can skip ahead to step 3 after spraying.
Step 2: Flour The Tin Properly
The flour layer provides an additional barrier between your cake and the tin. This step might be slightly messy (working over the sink is recommended!), but it’s worth the effort.
Take a spoonful of flour and hold it evenly over the tin. With a gentle shake of your wrist, shower the flour down to coat the greased surface. Don’t worry if the distribution isn’t perfect initially.
Hold your tin over the sink and tilt it in different directions, tapping gently to move the flour around until all greased surfaces are evenly coated. Once you’ve achieved an even coating, turn the tin upside down and tap it gently to remove any excess flour.
A perfectly floured tin will have a thin, even white coating with no visible gaps or heavy clumps.
Step 3: Line For Extra Insurance
Some bakers might wonder if lining is necessary after greasing and flouring. While some recipes only call for greasing and flouring, adding parchment paper provides fool proof insurance, especially for delicate cakes or deep tins.
For round tins, you can purchase pre cut parchment circles, or easily make your own:
- Place your tin on a sheet of parchment paper and trace around it
- Cut just inside your traced line for a perfect fit
- Place the circle in the bottom of your greased and floured tin
- Lightly grease the top of the parchment too
For an even quicker method, fold a parchment sheet into triangles until you have a pointed end. Place the point at the center of your upturned tin and cut where the paper meets the edge. When unfolded, you’ll have a perfect circle!
Step 4: Releasing Your Cake Like A Pro
After baking, patience is key! Allow your cake to cool in the tin for 10 to 15 minutes. This cooling period allows the structure to set properly before removal.
Once cooled slightly, run a butter knife gently around the edges if needed, then confidently flip the tin over. Your cake should slide out effortlessly, leaving nothing behind.
Gently peel away the parchment paper. Thanks to your thorough greasing, you won’t lose any of that perfect crust!
Special Techniques For Different Tins
Not all cake tins are created equal! Different shapes and styles require specific techniques to ensure your cakes release perfectly. Here are some specialised approaches for those trickier tins in your collection.
Bundt Tins: The Ultimate Challenge

Bundt tins with their intricate patterns require extra attention:
- Use a pastry brush to ensure grease reaches every groove and crevice
- A spray with flour incorporated works brilliantly for these detailed tins
- Consider chilling your greased tin before adding batter for even better release
Square and Rectangular Tins
For these shapes, consider lining the entire tin:
- Cut one strip of parchment for the length and one for the width
- Make sure they’re wide enough to cover the sides with some overhang
- This creates “handles” to easily lift out your finished cake
Troubleshooting Sticky Situations
If you’ve had trouble with cakes sticking in the past, try these solutions:
Problem: Cake still sticks despite greasing?
- Your tin might be too old or scratched, creating spots where cake can grip
- Try increasing your cooling time before attempting to remove the cake
- Consider investing in good quality non-stick tins
Problem: Greasy cake edges?
- You may be using too much grease
- Try using a paper towel to blot excess after applying
Problem: Flour leaves white patches on dark cakes?
- For chocolate cakes, use cocoa powder instead of flour
- For other dark cakes, consider using just parchment without flour
When To Skip The Grease
Not all cakes need greased tins! For these recipes, avoid greasing:
- Angel food cakes need to climb up ungreased sides to reach their full height
- Sponge cakes that rely on whipped egg whites often specify ungreased tins
- Some cheesecakes bake best in ungreased springform tins wrapped in foil
Ready For The Perfect Cake Release?
Taking a few extra minutes to properly prepare your cake tin is one of the easiest ways to ensure baking success. For those who value simple, effective methods with minimal mess, mastering this technique means you’ll never again face the heartbreak of a cake stuck in the tin!
With these techniques in your baking arsenal, you can confidently tackle any cake recipe knowing that your creation will release perfectly every time. Happy baking!
Want more baking tips? Share this article with friends who love to bake, or leave a comment with your own pan preparation secrets!
SEE ALSO: How To Clean Your Kettle The Right Way (So It Lasts For Years!)
Also, follow us on Pinterest ...