
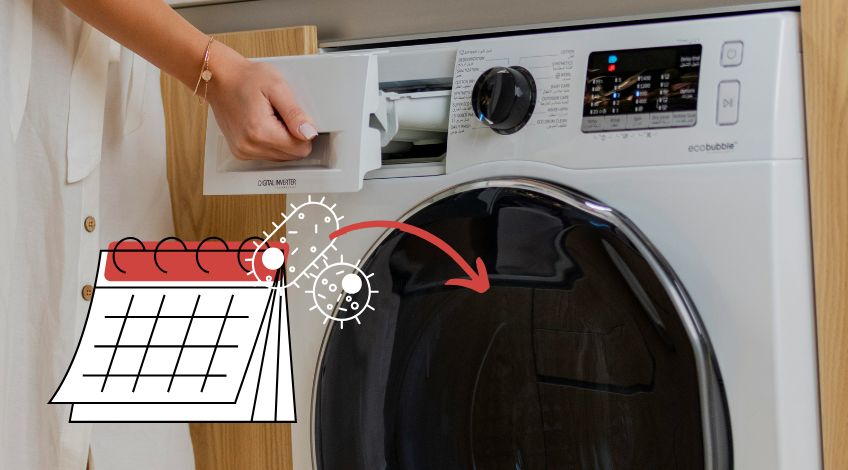
If You’re Not Doing THIS Monthly, Your Washing Machine Is a Bacteria Breeding Ground!
When you think about washing machines, you probably picture your dirty, smelly, bacteria ridden laundry coming out sparkling clean, smelling divine, and free of germs. Spoiler alert: That’s not always the case!
Instead, your washer could be turning into a party hub for germs and bacteria, making your “clean” clothes their next big hangout. Gross, right? But don’t panic, this short guide will help you evict those unwelcome guests. Read on for tips that could save your family from becoming a walking bacteria colony.
Noticed A Bad Smell Coming From Your Washing Machine? Here’s Why

If your washing machine smells like something crawled inside and died, the universe is trying to tell you something: It needs a deep clean, pronto!
The bad news? That smell is a sure sign of bacteria setting up camp. The good news? You’re about to learn how to reclaim your washer, and your nose. Let’s break down where those little stinkers love to hide.
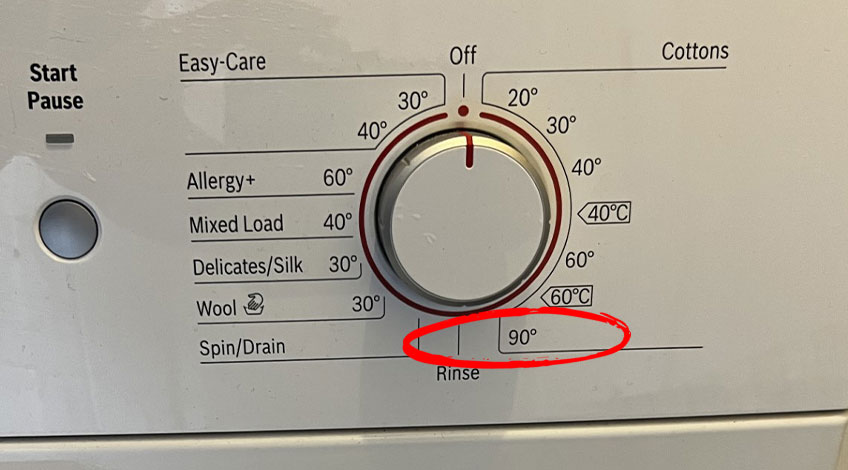
Your washing machine will only start producing bad smells if there’s something wrong. But strong “off” smells in your washer all stem from pretty much the same place.
It’s a sure and certain sign that your washing machine needs cleaning! If you consult your user manual you’ll see that manufacturers recommend that their machines need to be regularly maintained.
Now we’re not saying you need to go out and get trained as a washing machine engineer (although it might be useful), but we are saying that you can treat your washer to a deep clean every so often. Before you reach for the scrubbing brush, let’s explain exactly what could be causing that bad smell.
Once you have that information, you’ll be able to prevent bacteria from setting up camp and prevent any nasty mishaps from occurring to your family via germ ridden “clean” laundry. So, let’s start with the most obvious places where bacteria is likely to be found and work from there.
The Pump Filter
A blocked or partially blocked filter is often the primary source of bad smells and bacteria build ups on washing machines. This means the filter needs to be cleaned at least once every four weeks as a preventative measure.
Here’s the deal: If you haven’t cleaned this filter in months (or ever), brace yourself. You might find buttons, hair, and enough gunk to make you question your life choices. But hey, at least now you know where all your missing socks went!
You’ll find the pump filter at the front bottom of the washer, often hidden behind a pull down flap. The filter simply unscrews (anti-clockwise) and pulls out. But you need to remember to place a bowl underneath the filter before removing it because there’s always some water in the filter that could spill onto the floor.
You might want to lay an old towel down underneath the bowl in case there’s more water than normal. Once the filter is out, it will need cleaning in warm soapy water and then rinsing under a fast flowing tap and possibly scrubbing with a soft brush to remove any built up dirt or debris (depending on how long it is since you last cleaned the filter).
You then need to check inside the filter housing and remove any dirt, debris, or other items like screws, nails, buttons, hair or anything else that could have got into the machine in your pockets and started to block the filter.
The Detergent Drawer
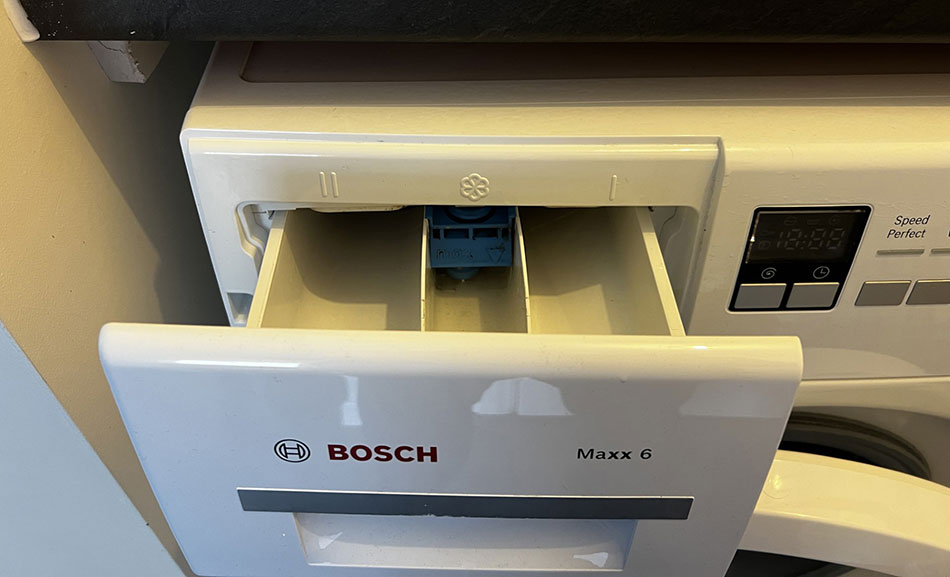
Remember when your detergent drawer was shiny and new? Now it’s probably more “haunted swamp” than “sparkling clean.” All that gunky detergent residue and mould isn’t just gross, it’s infecting the water that cleans your clothes. Yikes.
Here’s a fun weekend project: Grab an old toothbrush and scrub that drawer until it looks like it just came off the showroom floor. Think of it as your good deed for the week.
This is the second most common cause of germs and bacteria as well as bad smells. And when you think about it, all of the water that enters your machine passes through the detergent drawer on its way to wash your clothes.
So, your laundry is getting infected by the very water sent to get it clean! You can guess what’s coming next right? Yep…It’s time to clean that detergent drawer.
Cleaning The Detergent Drawer
You need to remove the detergent drawer and give it a good clean in soapy water using an old toothbrush to get into all of the nooks and crannies. Once you’re sure the drawer is clean, you can work on the drawer housing.
This is often just as bad or even worse than the drawer itself. You should notice a large hole at the bottom of the area which you should block with a cloth to prevent anything large (like the toothbrush you’re going to scrub the area with) from falling inside. If you do drop something large in there, you’ll need to call out an engineer which could prove expensive.
Now give everything in sight a good scrub with the toothbrush paying particular attention to the holes at the top of the cavity because this is where the water jets out and they often get clogged with limescale or mould.
If you find any of these holes blocked, you can use a cocktail stick or thin piece of wire to gently unblock the holes before finishing off with your trusty toothbrush.
The Door Seal
The rubber door seal is like that one forgotten corner of your fridge, something you don’t think about until it’s too late. If you spot black mould stains, it’s time to take action.
Pro tip: White vinegar works wonders here. But don’t go overboard, too much can damage the seal. Think of it as using fire to fight fire, but make sure you extinguish it properly afterward.
Once all of the badness has gone, rinse the rubber seal properly to remove any white vinegar residue. This is because white vinegar can cause damage to rubber over time.
So although white vinegar is a great cleaner for washing machines, it’s not so good for rubber which is why you need to ensure it has all been removed.
The Drain Hose
Still smelling something funky? Time to go CSI on your washer’s drain hose and standpipe. A quick inspection can reveal whether your machine’s plumbing is clear or in desperate need of TLC. Just think of this as detective work, with a touch of plumbing.
This is where all of the water, detergent, dirt, grime, germs and bacteria leave the machine. So it’s worth giving it the once over. All you need to do is remove the drain hose from the standpipe and have a quick look inside.
It if looks clear, it probably is and you’ll need to move onto the standpipe itself.
The Standpipe
The most simple way to check the standpipe is to take a photo using your phone from above. If any water sitting at the bottom of the standpipe is clear, you’re golden. If it’s dirty, full of hairs or any other debris, you’ll need to remove the “S” bend at the bottom.
The “S” Bend
To check and clean the “S” bend all you need to do is put a bowl of water underneath to catch any water spillage and then unscrew the joint. Once you have the “S” bend off, wash it out and remove any dirt, gunk or other nasties before replacing it.
The Drum
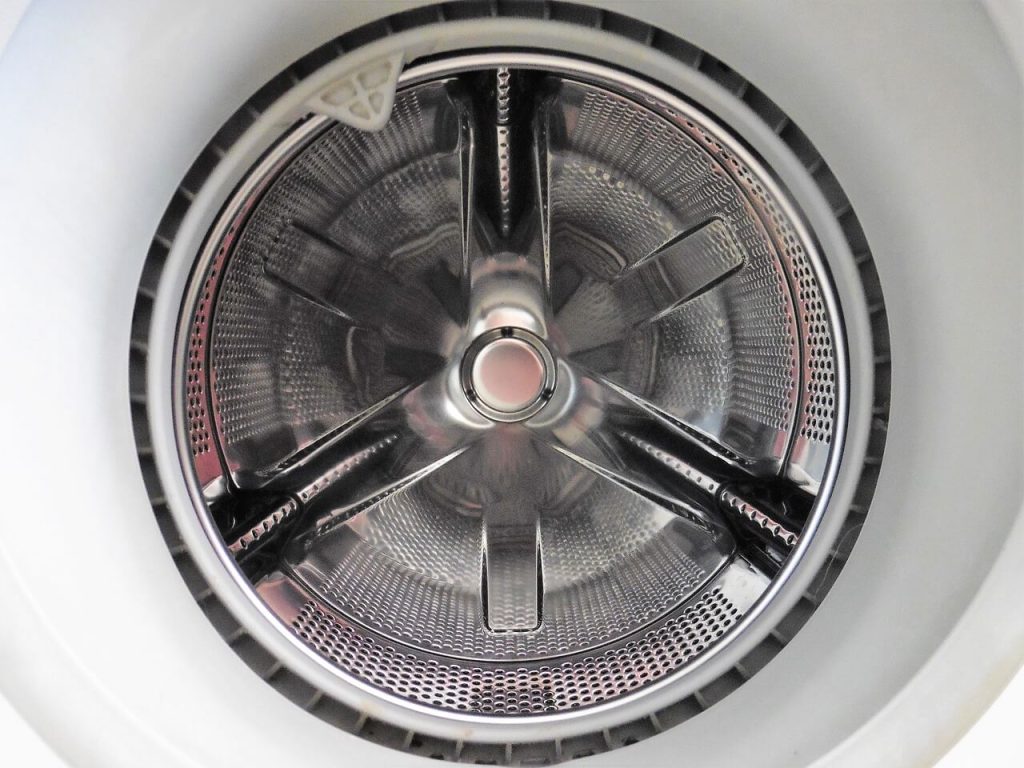
Here’s the plot twist: The inside of your drum might look clean, but germs could be lurking in the outer drum. What’s the fix? A monthly service wash.
If you’ve never done one before, now’s the time. Just don’t toss in any clothes unless you’re going for the “tie-dyed by bleach” look. (Hint: It’s not as trendy as it sounds.)
You can use a proprietary drum cleaner or run a service wash using ½ a cup of bleach in the drum or 1 cup of white vinegar to blast those germs away.
Just make sure to give the machine an extra rinse to ensure all of that bleach or vinegar has been removed before you use the washer again.
Don’t Know What A Service Wash Is?
If the term “service wash” is a foreign concept to you, let’s explain exactly what it is. It’s basically a wash using the hottest cycle on your washer.
Most modern washers have a designated service wash or drum wash program and if yours does, now you know what it’s for. If you can’t find it on your machine, just run the hottest cycle your machine has and you can call that the service wash.
Oh, and by the way, you don’t wash any clothes during the service wash, it’s purely to clean the machine. So it’s an empty washing machine being washed using the hottest temperature wash available on that machine.
So, What Should You Use To Remove Bad Smells From Your Washer?
You can buy special washing machine cleaners to use in the service wash. They all work in a similar way and are packed full of chemicals. If the thought of using chemicals to clean your washer isn’t very appealing to you, there are natural alternatives that you can use. Which include;
- White Vinegar
A natural germ assassin. Bonus: It makes you feel like a cleaning wizard. - Bleach
Powerful but risky, handle it like it’s a ticking time bomb. Gloves are a must. - Soda Crystals
Cheap, cheerful, and effective. Your washer will thank you.
Pick your poison, but remember: cleaner today, fresher tomorrow.
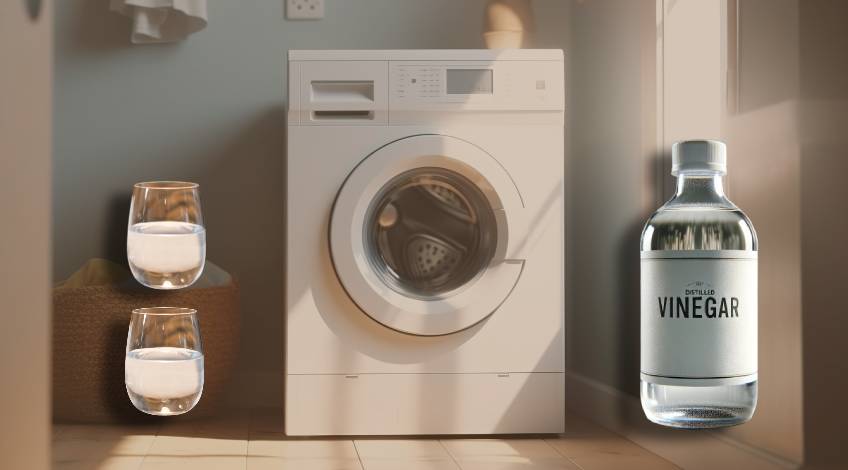
White Vinegar
Our old friend white vinegar has many uses around the home including cleaning washing machines and removing bacteria. It has natural antibacterial and fungicidal properties which is a fancy way of saying it gets rid of germs, bacteria and mould.
You should give the drum, detergent dispenser drawer and the rubber door seal a good wipe round and clean using white vinegar. If you’re worried about your washing machine smelling like a bag of chips, just mix a little detergent in with the vinegar.
Add 1 to 2 cups of white vinegar to the drum when you start the service wash to eradicate germs, bacteria and mould from your machine and take away any bad smells.
Bleach
If you’d prefer to give your washer a good clean using bleach, you need to water it down to a 50/50 solution with warm water. Make sure to always wear gloves and keep the bleach away from your clothes.
Even in this diluted form, bleach can be harmful and ruin clothes not to mention what it can do to your skin! Also make sure to rinse the machine after use before you go putting any laundry in unless you want it tie-dyed.
Soda Crystals
Another household staple, soda crystals are a great all-rounder when it comes to cleaning the home. To get your washer clean and germ free, just add 500g of soda crystals into the drum and run a hot service wash.
Ways To Stop Your Washing Machine Getting Smelly

Don’t want to end up here again? These tips will keep your washer bacteria free and smelling as fresh as a spring morning:
Always Use The Right Amount Of Detergent
Less isn’t more when it comes to detergent, underdo it, and you’re basically inviting bacteria to the party.
All washing machine detergents have built in cleaners for the machine as well as the clothes. This means everytime you wash your laundry, you’re automatically washing the machine as well.
But this magical cleaning power only works if you’re using the right amount of detergent. Always make sure to use the correct amount for every wash load.
It’s worth bearing in mind that hard water affects how much detergent you’ll need to use as well. Plus, using less detergent than is recommended can cause bad smells, a buildup of bacteria and cause the internal hoses of your appliance to rot over time.
Don’t be that person, don’t take a chance, remember, this is your family’s health we’re talking about here. Always, always, always use the correct amount of detergent.
Use Detergents With Bleaching Agents Whenever You Can
Whenever you’re doing a white wash, use a detergent that has bleaching agents. The bleaching agents will help in the fight against mould and bacteria.
Perform A Monthly Service Wash
To prevent a buildup of dirt, mould, germs and bacteria, you should run a hot service wash once every month to ensure your machine runs at its best.
And remember if your washer doesn’t have a service wash program, just run the hottest temperature wash cycle with no laundry and use your preferred washing machine cleaner.
Don’t Always Use The Cool Wash
Sure, it’s eco-friendly, but your washer still needs a hot cleanse every now and then. Think of it as a spa day for your machine.
We’re always being told how using a cool wash cycle is best for our clothes and best for the environment. But if we only ever run our washer on a cool wash cycle, it’s bad for the machine.
All washing machine manufacturers agree that running a hot service wash every four weeks is necessary to clean and maintain their appliances.
Cool washes are great for encouraging the growth of mould and bacteria in your machine which will lead to bad smells and potentially harmful pathogens that could make you and your family ill.
Never Leave Wet Washing In The Drum
Unless you want your clothes to double as a science experiment, take them out immediately after the cycle ends.
Once the cycle has finished, always remove the laundry straight away. Leaving wet laundry in the drum is a great way to promote mould and bacteria growth.
Let The Breeze Blow
After you’ve finished using your machine, leave the door and detergent drawer open to allow a free flow of fresh air. This will let the washer dry out properly and prevent the growth of mould and bacteria.
Over To You
So, there you have it, everything you need to keep your washer from becoming a bacteria breeding ground. Still tempted to skip the monthly clean? Imagine wearing clothes that smell like a sewer.
Have any horror stories about neglected washers? Share them in the comments, misery loves company. And don’t forget to send this to that friend who still doesn’t know their washer has a filter. You’ll be doing them (and their noses) a huge favour.
SEE ALSO: Are You Washing Your Clothes Too Often? The Answer Might Shock You!
Also, follow us on Pinterest ...


