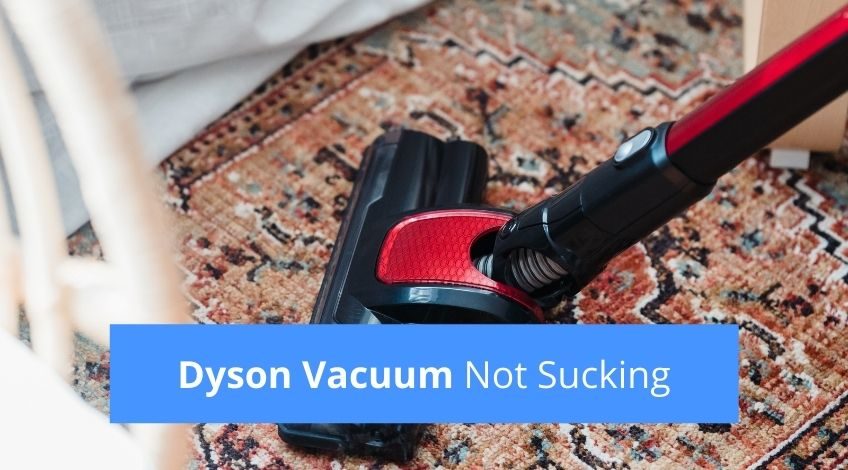
Dyson Vacuum Not Sucking? (here’s what to do)
If you own a Dyson vacuum then you know just how powerful it is and just how much dirt and debris it can remove from your floor. But eventually every vacuum, even a Dyson will lose suction, but don’t take your vacuum to the repair shop. Keep reading for all you need to know to restore full cleaning power to your Dyson vacuum.
There are a number of reasons why your Dyson vacuum has stopped removing debris from your floors and most of them can be repaired by you indoors without any engineering knowledge at all. Many will take no tools either so let’s get into restoring the suction to your Dyson vacuum.
What To Do If Your Dyson Vacuum Is Not Sucking Or Loses Suction
If your Dyson vacuum has stopped sucking altogether or just seems to have lost power you need to check the following;
Inspect The Bin
The most common reason for a loss of suction in a Dyson vacuum is the bin is full. If the bin is full or nearly full, there is less space for more dirt and dust which will weaken the level of suction the vacuum can produce. Remove the clear bin from your Dyson, hold it over a bin and trigger the release catch to allow the dirt and debris to fall into your bin. Then replace the clear bin onto your Dyson and check for suction power.
Clear The Roller
This should be your first port of call if your Dyson vacuum’s suction is depleted and it’s not caused by a full bin, as it’s usually where any problems or blockages lie. If the motor is still running but there is far less or no suction the most probable cause is a problem with the roller. Unplug your Dyson and turn it upside down to enable an easy inspection of the roller.
The roller should be uninhibited by cotton, string or hair and spin freely when turned by hand. If you own a pet, have carpets with loose edges or you or a family member has long hair it’s highly likely that this is what’s causing the problem. These long stringy or hairy fibres get wrapped around the roller preventing it from turning correctly and causing the vacuum to stop picking up as well as it once did.
The roller needs to be cleaned and before you can successfully clean the roller you’ll need to gain access to it.
How To Clear The Dyson Roller
To do this you’ll need to remove the plate that holds the roller in position. It will be held by a number of large screws (numbers vary depending on the model vacuum you own) all you need to do is twist the screws by ¼ turn to remove the plate.
There’s no need to remove the roller completely as it is held in place via a rubber belt which can be difficult to replace. But now you have better access to the roller it will be easier to remove anything wrapped around it that shouldn’t be there. With a pair of scissors, carefully cut away any hair, string, cotton or pieces of carpet that’s stuck to the roller.
It might take some time to cut and remove all of the mess stuck to the roller but be sure to remove it all. Be sure the roller is completely clean before reassembling the roller plate.
Check The Bristles
Over time the bristles on the roller can become worn and lose their sharpness. This could be the cause of the loss of suction. If that is the case, you will need to replace the roller bar.
Wash And Dry The Filters
If there is no visible debris on the roller or you have removed all of the foreign objects from the roller and the vacuum is still not picking up correctly, you’ll need to inspect the filters. Even models with only one filter will get blocked eventually which will cause a loss of suction. Most Dyson vacuums have reusable filters so it’s simply a case of removing the filter, washing, drying it and replacing it.
To correctly identify which Dyson vacuum you own and therefore how many and where to locate the filters, you’ll need to know the model number of your vacuum. With the vacuum disconnected from the power supply, search for a label which contains your serial number. This label will usually be located in one of the following places;
- Behind the hose
- Between the wheels
- Behind the clear bin
If you can’t find the serial number in any of these places go to the Dyson website[1] for more help. Depending on the model vacuum you own you will be able to obtain information on which filter to clean etc. For instance the V11 needs the filter washed every month whereas the DC06 has 2 filters but only one should ever need washing.
Follow Dyson’s instructions on how to remove the filter(s) in your vacuum and the correct method of cleaning it. As these instructions are model specific it’s advisable to obtain the information on your particular model from the Dyson website to avoid unnecessary damage.
Once the filter(s) have been washed until the water runs clear, it’s vitally important that you dry the filter completely before replacing it into the vacuum. To correctly dry your filter, you’ll need to place it near a window, radiator or some other warm spot for up to 12 to 24 hours. Never dry your Dyson filter in a tumble dryer, microwave or near an open flame, it must be allowed to dry naturally.

Clear Blockages From The Hose
This is another common reason for loss of suction in Dyson vacuums and is relatively easy to clear. As there are so many designs of Dyson vacuums there are different techniques used to clear any blockages.
For instance on an upright model, you’ll need to remove the clear bin and turn on the vacuum. Feel the suction from the exhaust and see if it’s stronger than when the bin was in place, if it is you’ll need to check the cleaning tool and cleaning head for blockages. The topmost shelf of the head is the usual blockage point and to clear this you’ll need a wire clothes hanger to remove any debris.
On canister models, the hose can be removed from the inlet to check suction power. If you suspect it’s the hose that’s blocked, remove the extension wand and look through the hose, if you can see a blockage or partial blockage use a wire coat hanger to remove it.
Check that the hoses are fitted correctly as an incorrectly fitted hose will not create full suction. Also check there are no punctures in any of the hoses.
Check For Nozzle Blockages
Check the nozzle for any blockages and remove as necessary. On cable-free hand-held units the long nozzle is often prone to blockages and once it’s removed from the main unit a broom handle can be used to remove any blockage with ease.
Check The U-Bend For Any Obstructions
There are a number of Dyson models that have a U-bend pipe at the back of the machine that is connected to the attachment hose and the dust cup. On some it is transparent in which case it’s easy to inspect for any apparent blockages. On others this U-bend pipe is opaque, on these you’ll need to ¼ turn the screw to remove the pipe for inspection. We often find a quick blow into this pipe can be all that’s needed to ensure the pipe is clear of any obstruction.
Inspect The Side Valve
On some models there is a side valve which can be removed simply by pushing the nearest button to it. Blow into it to see if it’s obstructed at all. If you can’t feel the air flowing freely through the other end as you blow it, it needs cleaning.
How To Help Prevent Dyson Vacuums Loss Of Suction
We all lead busy lives with not enough hours in the day, and it’s easy to just do things on “autopilot”, without concentrating on what we’re doing. These are the times that most often cause problems especially with our vacuums. Always check the bin isn’t full or nearly full before you vacuum your home.
Watch what you’re sucking up into your Dyson, keep away from string, cotton and other materials likely to wrap around the roller and cause problems. Check the roller regularly for hair, string etc and remove as necessary. Clean filters regularly to prevent any loss of suction and allow to dry naturally.
If you ever need replacement parts we recommend using Dyson original parts and not some cheaper imitations. Dyson parts are made specifically for Dyson machines and as such are designed to work with other Dyson parts. Although these parts might seem expensive compared to cheaper brand parts, it’s cheaper to replace a genuine Dyson part than it is to replace the whole vacuum.
SEE ALSO: Shark Robot Error Codes (troubleshooting guide: ION, IQ, EZ & AI)
Frequently Asked Questions
The reason you should dry your filters after washing before replacing is that water and electricity don’t mix too well. It is possible to damage your Dyson vacuum beyond repair if you allow water to enter the motor or other working parts.
There are a number of reasons why your cordless Dyson is pulsing, it could be the power is running out and it needs recharging, the Max power button has been activated, the bin needs emptying or the filter needs cleaning.


