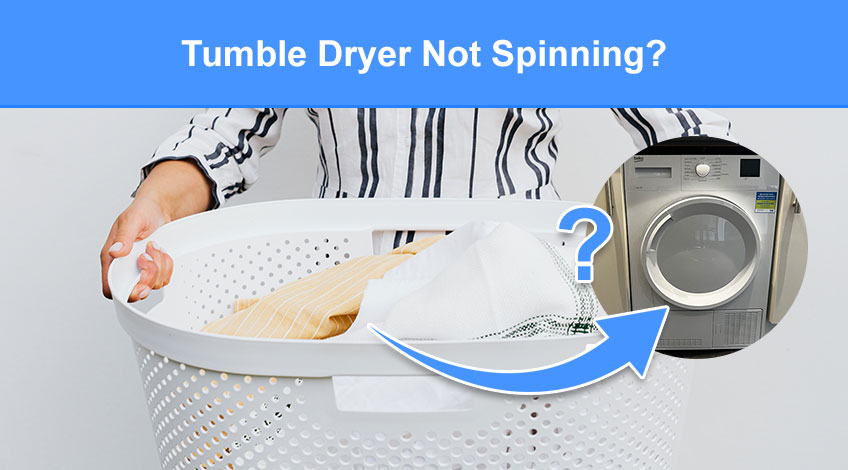
Tumble Dryer Not Spinning? (why it stopped turning & how to fix)
If your tumble dryer is heating up but not spinning, don’t panic, it’s quite a common problem. There are several easy to fix faults that could be causing the problem.
The Easiest Way To Fix A Tumble Dryer That Doesn’t Spin
There are several ways to get your tumble dryer working again if it has stopped spinning. There’s one quick fix that often works so let’s start there.
Quick Fix To Get The Dryer Spinning Again
The first thing to do is to check that the lint filter (on a vented dryer) or water reservoir (on a condenser dryer) isn’t clogged or full. If the dryer feels hot, allow it to cool for at least 30 minutes.
Once you’ve completed all of the above, press the reset button or, if your dryer doesn’t have a reset button try turning it on and off again. In many cases this will solve the problem.
What To Try If That Doesn’t Work
Let’s start with the most common reasons for the drum on a tumble dryer to stop spinning and take it from there.
The first few of these are pretty obvious but you’d be surprised just how often experts get called out for these simple to solve issues.
Check The Plug
The very first thing to check is whether the plug has become dislodged from the socket. We know, too simple right? But it has been known.
Check The Fuse/Circuit Breaker
The next thing to check is whether the fuse has blown or the circuit breaker has tripped.
If this is the case, it might be a good idea to call in an electrician or electrical engineer. Because fuses don’t blow for no reason which means something is shorting out.
Check That The Door Switch Is Working Correctly
Often, the door catch gets something caught in the mechanism which prevents the door from closing sufficiently. Check that the door catch on your tumble dryer is free from any material, fibres etc. and then try the dryer again.
Another common fault is the peg on the door catch becomes slightly bent. This prevents it from clicking fully into place and with the connection not completed, the dryer won’t work.
Try gently bending the peg until it looks straight again. Be careful that you don’t apply too much force and snap the peg.
If the peg looks OK and the dryer still won’t start, you might need to replace the switch.
Check The Drive Belt
A broken or loose drive belt is one of the most common reasons for tumble dryers not spinning. The easiest way to check whether the drive belt is broken is to open the dryer door and try to turn the drum by hand.
If it turns really easily, with little or no resistance, the drive belt will almost certainly be broken. The drive belt can be replaced, and if you’re into DIY, check out the home repairs section below.
Check That The Thermal Fuse Hasn’t Tripped
The thermal fuse is a safety feature which is designed to prevent the dryer from catching fire.
If the thermal fuse has tripped, it would explain why the drum on your tumble dryer isn’t spinning.
Sometimes you can reset the thermal fuse but in some cases it will need to be replaced. However, before you attempt to replace it, you’ll need to investigate why it tripped in the first place.
The first thing to do is check the dryer’s display panel for any error codes and then check the manual to see what’s happening.
The most common cause is that the lint filter on vent tumble dryers is clogged or if you have a condenser dryer, the water reservoir is full. Try cleaning the filter/emptying the water reservoir and see if this solves the problem.
You should allow the dryer to cool down completely before attempting to start it up again.
If not, we’d recommend calling an appliance repairs engineer to inspect your machine and make sure there’s nothing serious causing the thermal fuse to trip.
Internal Faults That Could Stop The Drum Spinning
Now that we have looked at the most common causes of tumble dryers not spinning, let’s look at the less frequent, but more serious issues that can arise.
Unless you are skilled in engineering and electrical engineering in particular, we’d advise leaving all of the following to an expert.
Worn Out Drum Rollers
The drum rollers (or glides as they’re sometimes called) are small wheels that hold the drum in the correct position as it spins.
If these rollers get stuck or don’t spin freely, the drum can’t move and the drum rollers are probably worn out.
To check if the rollers are worn, open the dryer door and look at the back wall of the machine. If there’s a gap between the drum and the wall, the most likely cause is worn drum rollers. See below in the home repairs section for more information.
Worn Out Pulleys
The pulleys inside the dryer can become worn which could cause the drive belt to fall off. To get at the pulley, you will need to take the dryer apart. For more information see below in the home repairs section.
Worn Out Roller Axles
The roller axles, or roller shafts as they’re sometimes known, are major components on a tumble dryer. If the drum develops a wobble, it’s very likely to be the roller axles that are worn.
Worn Out Drum Bearing
The drum bearing supports the rear of the drum. If the bearing is worn out, it causes the motor to become strained. A good indicator of a worn drum bearing is a squealing or grinding noise when the drum spins.
If this is the case, the drum bearing will need to be replaced.
SEE ALSO: Noisy Tumble Dryer? (screeching, squeaking & grinding noises explained)
Broken Motor
The drum on your tumble dryer won’t spin if the motor is broken. Over time the motor can become overloaded or worn out. Once the motor breaks, it will need to be replaced.
Tumble Dryer Home Repairs
In this section we share the information you will need to carry out any repairs needed to your tumble dryer at home.
You should only attempt to repair your tumble dryer once the dryer has been disconnected from the electricity supply. Some of these repairs should only be carried out if you are a competent electrician or electrical engineer.
Replacing The Drive Belt
You can buy tumble dryer drive belts from many online outlets, but you need to order the correct one.
All tumble dryers have drive belts, but they’re not all the same size, there is no one-size-fits-all when it comes to tumble dryer drive belts.
You’ll need to know the model number of your tumble dryer to ensure you order the correct belt.
To fit the new drive belt, you’ll need to take the side and top panel off your machine. Ensure it is unplugged before starting to dismantle the panels for safety.
Undo the bolts on the pulley and drive motor assembly to loosen the old drive belt and remove it.
Place the new drive belt onto the pulley and drive assembly and tighten the bolts. Use these bolts to tension the new belt, it should be tight but not too tight.
The best way to check that you’ve got the correct tension is to tighten the bolts, and then spin the drum by hand and see if it feels right.
Replacing The Drum Rollers
With the drive belt removed, it is relatively easy to access the drum rollers. The drum should move just enough to gain access to the drum rollers.
SImply undo the bolts that are holding the drum rollers in place and replace them with new ones.
As with the fan belt, different dryers have different size drum rollers. So make sure you get the correct rollers for your model.
Replace The Pulley
With the fan belt removed, it is easy to get at the pulley. You should notice a hook on the back of the pulley. This hooks into the motor assembly.
Once you have the new pulley in position, put one screw in to hold it in place. Don’t tighten it too much; you can then secure the pulley in position with the other screw.
Replacing The Roller Axles
To gain access to the roller axles you’ll need to remove either the back or side panels depending on the make and model of your tumble dryer. The roller axles will be found at the base of the dryer drum.
In some cases you’ll need to remove other components to get to the roller axles.
Before removing the bolts, brace the drum with some blocks of wood as it will drop as soon as the bolts are removed.
Once you’ve removed the old roller axles, fit the new ones in place and secure them with bolts and remove the blocks of wood, then replace all of the components before replacing the panels.
Replacing The Drum Bearing
The tumble dryer drum shaft fits at the rear of your machine on the outside. It runs through the back of the dryer and sits on a bearing which is attached to the rear panel to allow the drum to spin.
To replace the drum bearing you’ll need to buy a drum shaft kit, which includes a new shaft, new bearings, new bearing pads, screws, washers and seals.
You then need to remove the dryer’s door then lay the dryer on its front and remove the side, back and top panels.
After that you’ll need to remove almost all of the components inside the dryer. This includes; the vent tube, bearing cover, heater and you’ll need to remove the heater cable. Once the heater has been removed you’ll need to remove the fan.
You’ll now need to disconnect the wires (it’s a good idea to take a few photos of the wires in situ to make replacing them easier later).
Then it’s on to the actual shaft itself which is secured by a shaft collar which has a pin running through the end of the shaft. Once you’ve removed the pin, the shaft collar will slide out.
Remove the drive belt and pulley then you can lift the drum. This will make it easy to remove the drum shaft. Once you’ve replaced the shaft, you should replace the bearing pads and the seal that goes around the outside.
The bearing pads should just unclip but you’ll need to remove the old seal by pulling it away. Then replace the seal and finally clip the new bearing pads in place.
Then you need to put the tumble dryer back together. This is a very difficult part to replace which is why we would advise you to call in an engineer to make sure it is fitted correctly.
Replacing The Motor On A Tumble Dryer
To access the motor you’ll need to remove the top and side panels. You’ll see the wires connected to the motor. At this point we advise you to take a photo of the wire configuration to make it easier when you fit the new motor.
Remove the cable tie that’s holding the wires, then remove the wires and the cable clip that’s attached to the heater casing.
You’ll then need to remove the small bearing casing and the heater casing. Then remove the heater casing and the attached heater, pulling the wires through the unit.
After that, remove the jubilee clamp holding the recirculation fan and remove the recirculation fan. You’ll then need to remove the cooling fan before releasing the belt tensioners.
Then remove the drive belt from the belt tensioner. Now you can get at the motor and remove the 4 bolts retaining the motor. Remove the motor and put the new one in position.
Secure it into position with the 4 retaining bolts then put the dryer back together in reverse order.
This is another difficult task to perform unless you are an electrical engineer. Which is why we recommend contacting a professional appliance engineer to undertake this task for you.
In some cases it works out more cost effective to buy a new tumble dryer than to have your old one repaired.
SEE ALSO: Different Types Of Tumble Dryers Explained – with our top recommendations for each
Frequently Asked Questions
A replacement dryer belt will cost you anywhere between £10 to £20.
It is a relatively easy task to replace a dryer belt.
Whether it’s worth fixing a tumble dryer or not depends on the age of the machine and the cost of the repair. If the tumble dryer is more than 10 years old and the repairs will cost over half the price of a replacement machine, you should get a new tumble dryer.
If the drive belt is broken on your tumble dryer, it will not dry your clothes. This is because the drum will not turn until a new drive belt is fitted.
The average life expectancy of a tumble dryer is around 10 years. With that said, there are some dryers that are claimed by the manufacturers to last for 25 years.
Also, follow us on Pinterest ...